Difference between revisions of "Tips and wrinkles 2"
(→Mini HPT) |
m |
||
| Line 1: | Line 1: | ||
To keep the page sizes of biopowered wiki managable, we've started a second Tips and wrinkles page ... | To keep the page sizes of biopowered wiki managable, we've started a second Tips and wrinkles page ... | ||
| + | See also [[tips and wrinkles 1]]. | ||
__TOC__ | __TOC__ | ||
| Line 55: | Line 56: | ||
[[User:Bio-rich-time-poor|Bio-rich-time-poor]] 23:15, 27 June 2011 (BST) | [[User:Bio-rich-time-poor|Bio-rich-time-poor]] 23:15, 27 June 2011 (BST) | ||
| − | + | See also [[tips and wrinkles 1]]. | |
[[Category:Biodiesel]] | [[Category:Biodiesel]] | ||
[[Category:Processors and equipment]] | [[Category:Processors and equipment]] | ||
Revision as of 08:55, 31 July 2011
To keep the page sizes of biopowered wiki managable, we've started a second Tips and wrinkles page ...
See also tips and wrinkles 1.
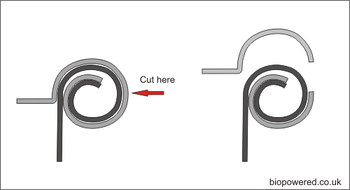
Y Piece
Useful for separating off the flow when using an Eductor Just a case of filing/grinding away on the two bits of pipe untill you get a nice close fit and then silver soldering in place
- click to enlarge
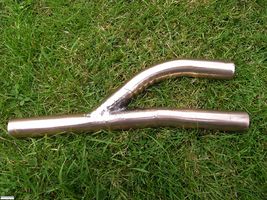
Y piece. Source: K.H

KH 22:47, 25 June 2011 (BST)
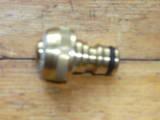
Using "Hozelock" type quick release connectors
Not to be used in the bio making process
The brass type hozelock connectors can be useful for various connections outside of making bio and can be used on small bore( ID 14mm) piping BUT you need to replace the O ring with a "Viton" type The O ring is 2mm with a diameter of 12mm,the plastic that clamps the pipe to the fitting is ok with biodiesel but they can be done away with and a jubilee clip used anyway,they also remain airtight upto about 20 PSI (see pics)
- click to enlarge
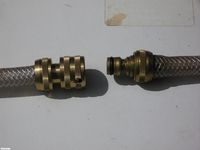
Male and female. Source: K.H
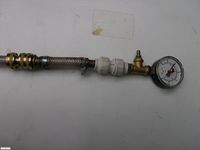
Pressure testing. Source: K.H
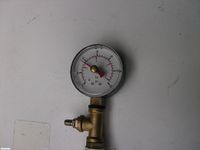
20 PSI. Source: K.H
Male fitting. Source: K.H


KH 23:45, 25 June 2011 (BST)
Micro HPT
Quick, simple and cheap method for performing the HPT which means you don't have to use the kitchen stove with associated smell in the house!
1 night light, the container from a second and a piece of bent electrical wire. It reaches temperature very quickly, but due to the flimsy nature of the container, cools down when the oil is added. So it needs to be left with the flame burning for a few minutes to reheat.
- Micro HPT
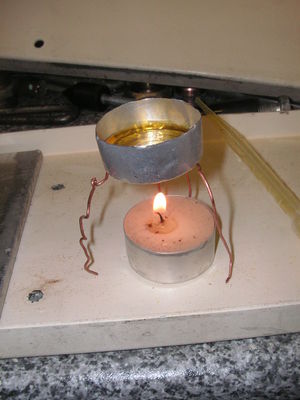

Bio-rich-time-poor 12:10, 26 June 2011 (BST)
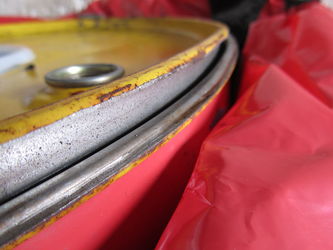
Drum lid removal
A novel idea from littledave. Slice through a drum seam with a 1mm cutting disk on an angle grinder and you have a removable lid. Dave recommends marking the lid and drum so the lid can be replaced in the same position each time. Not all drums will be perfectly circular and the position of the cut may not be in the same place around the circumference.
- Drum seam cutting


Bio-rich-time-poor 23:15, 27 June 2011 (BST)
See also tips and wrinkles 1.