Casting a venturi
This method of venturi manufacture comprises casting lead or solder into a pipe work mould using cores which create the specially shaped internal voids.
With care these can be manufactured with only the minimum of hand tools. The method involves melting lead (around 327°C) so suitable precautions should be taken when carrying out this process.
Contents
Cores
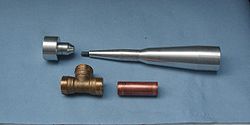
Cores can be made from several materials, steel, aluminium, wood or even plaster. Each has its benefits and drawbacks:
Steel
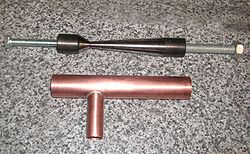
Will give an excellent finish to the internal faces of the venturi and is durable. It requires the use of a release agent without which there is risk the lead adhering, making it impossible to remove the cores. A lathe will be required to manufacture steel cores. The ends should be drilled and tapped to accept bolts to facilitate removal after casting.
Aluminium
Will give a reasonable finish but may degrade with multiple use. It doesn't require a release agent but a lathe will be required to make the cores. The ends should be drilled and tapped to accept bolts to facilitate removal after casting.
Wood
Will give a poor finish and can only be used once. Charring may evolve gas as the molten lead is pored worsening the finish. Wood cores do not require any special tools and can be made quite simply by whittling, filing and sanding. A wood csrew can be inserted into the ends after casting to facilitate removal.
Plaster
I haven't tried this yet but if a wood core is pushed into some Plasticine, plaster can be poured into the mould to create a core. Plaster cores will probably not give a smooth finish and will most likely be destroyed when removed. The plaster must be thoroughly dry before pouring the molten lead.
Core geometry and dimensions
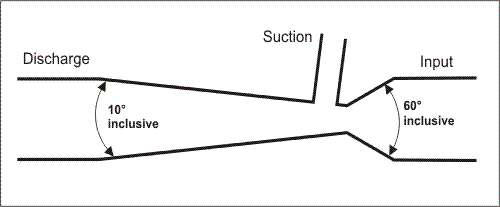
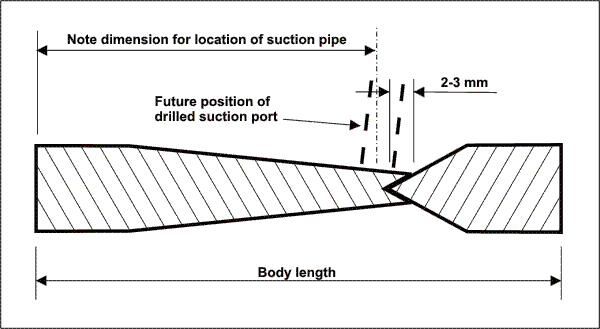
Whilst the dimensions of venturies will vary depending on the performance of the pump and the size of pipe work with which they are used, the basic geometry remains the same. The inlet cone should be 60° inclusive, and the discharge cone 10° inclusive.
Cores dimensions should be as follows:
Where the two cores meet at the throat, some form of location is required to ensure concentricity. The arrangement shown above is better suited to metal cores.
As an alternative, metal cores can be assembled using a central length of studding or a bolt to pull the two halves together and, with a slightly different design of core, blank the ends at the same time. Or a male and female thread can be created at the throat to provide both the location and clamping action, as in this excellent example by NigelB.
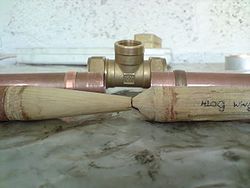
Wood or plaster cores could have flat ends with a small nail or panel pin placed centrally to aid location.
Assemble the cores and measure their overall length, this will be the length of the venturi body.
The position for the suction connection now needs to be established to enable the manufacture of the body. The suction port will be drilled through the cast lead, concentrically down the suction pipe. The suction port should penetrate the 10° discharge cone as close as possible to the throat but not break into inlet cone. As the throat will be cleaned up by drilling at a later stage it’s preferable to leave a little tolerance to allow for this. Aim to have the edge of the suction port approximately 2-3 mm from the throat.
Body
The body can be constructed in several ways using the overall length and suction port location dimension described above.
Fabricated body
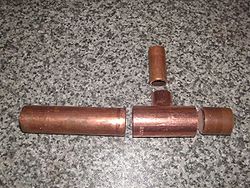
For those with the facilities a body can be simply made with two pieces of pipe. Ensure the ends are cut square and have no burs. Cross drill the larger through one wall, to accept the smaller. If using copper pipe, silver solder should be used for the joint, with steel pipe the joint can be welded or brazed. If not done prior to soldering, the smaller pipe should be dressed with a file where it penetrates the larger to ensure there is no internal lip at the junction which could trap air when pouring the lead.
Pipe fitting body
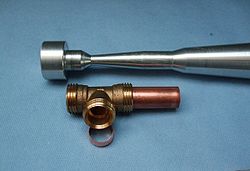
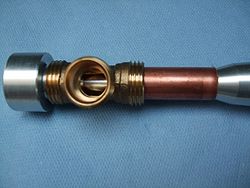
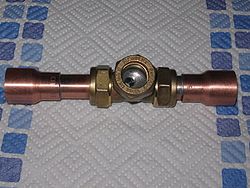
A body can be simply assembled from an appropriately sized pipe fitting and short lengths of pipe..
Ideally end feed fittings should be joined with silver solder to prevent molten lead/solder escaping during the casting process. This will not be necessary if a compression fitting is used, and may not be necessary with end feed fitting if the assembly can be clamped together with sufficient force and the ends of the pipes are cut clean and square.
Casting
When using steel cores it is imperative that you give them a good coat of lamp black all over including the parallel sections. It's normally quite difficult to get solder and especially lead to stick to steel, but sure as eggs are eggs it will when you don't want it to. Lamp black is basically soot. So take the cores and hold them close to a candle or nightlight flame until they are completely matt black with a very good coating. 15 minutes spent on this exercise will save an hour or more trying to recover a precious core from a solid venturi. I write from painful experience.
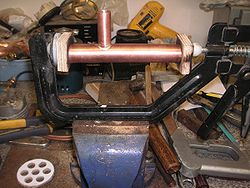
For the casting process the whole assembly, regardless of core material, must be clamped together firmly to prevent the escape of molten metal. As mentioned above metal cores can have this facility included, as with NigelB’s design.
Otherwise an external clamp camp should be used. In this example small pieces of plywood are used at either end. They offer protection to the clamp from the heat of casting and ensure a good seal at each end to prevent the escape of molten metal which may creep past the cores. If a soft wood block is used it may also take up very small discrepancies between the length of the cores and the body. Ensure that the body is perfectly level to prevent air getting trapped during casting.
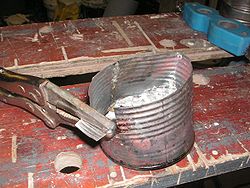
Use a cut down tin can as your crucible if you don’t have access to a lead melting pot. The following photo probably shows the arrangement better than I can describe in words, however it not too obvious from the photo but a spout was pinched opposite the mole grips.
A point of warning ... I'd recommend only using the can a couple of times and then replacing it. I had one that leaked after repeated use.
The most economical casting metal will be scrap lead. Solder may also be used and although more costly may run and adhere to copper pipe better than lead. A small quantity of flux could be wiped on the inside of the body to assist adhesion to a copper if you are using wood or aluminum cores. Don’t use too much flux as gas may be evolved during the casting and could be dangerous. The use of flux or cored solder is not recommended if using steel cores as there is a risk that this might promote adhesion to the core material making the cores impossible to remove.
The most effective way to melt the lead or solder is with a MAPP gas torch. Failing this a normal butane torch will suffice but will it will take a considerable time to melt the lead.
Once melted the solder and especially scrap lead, will form a skin known as dross. This needs to be raked off with an old kitchen fork or similar, into a suitable heat proof container to prevent it contaminating the casting.
Whilst keeping the metal in the crucible molten, heat the body and core assembly to assist the lead or solder accessing the furthest most parts of the mold. Then carefully pour the molten metal into the mold through venturi suction pipe. Keep playing the gas torch on the mold as you pour to ensure the metal is flows internally.
It’s not necessary to fill the riser any more than 5mm or so above the top of the main body. With an end feed fitting body it is only necessary to just cover the bottom of the pipe forming the venturi suction. If flux is applied to this joint, the lead or solder should make the joint as soon as the mold is filled to the bottom of the pipe. Filling further will result in molten metal escaping through the joint.
Don’t over heat the mold. Be very aware that it’s possible gas is evolved especially if you are employing wooden cores and have used flux. Its only escape route is through the riser (venturi suction pipe), so avoid peering down the pipe, you may get splashed with molten lead!
Allow the whole assembly to cool naturally.
If you produce a usable venturi at the first attempt, very well done. If you don't (and I didn't several times) have another go, you can always melt the solder/lead back into the crucible and reuse the body after a quick clean up.
Finishing
Once the assembly is cool you can remove the cores. They should release quite easily. If the whole thing is solid (only likely with steel cores) simply reheat over the crucible until the lead runs out and carefully remove the cores whilst still hot and when cool clean everything up and have another go. Remembering to apply sufficient lamp black this time!
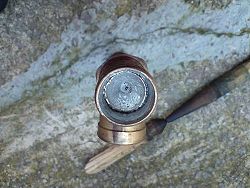
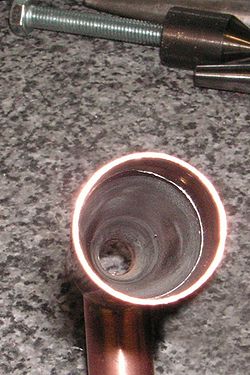
A successful casting will look like the picture right from Uberderv. In this case the molten metal has found its way between the joint in the cores. This is likely to happen if the body is slightly too long allowing the cores to separate or, with wooden cores, if they burn away slightly.
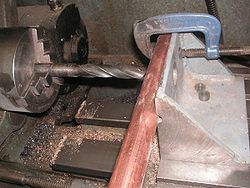
This is not a problem as the throat can be drilled out to the correct diameter, see venturi page. Even if you do end up with a through hole it’s a good idea to clean the throat up with the appropriate size drill. When doing this take great care to keep the drill parallel to the axis of the body.
Right is a photo of a venturi cast using steel cores and drilled on the lathe to ensure accuracy. Note the difference in finish between steel and wooden cores.
Having drilled the throat, the final operation is to drill the suction port at the location you worked out above. A certain degree of guess work is needed here as you are drilling slightly diagonally through the lead in the suction port so that the drill is at right angles to the inside face of the discharge cone. Provided the suction port breaks through wholly in the discharge cone and within a couple of millimeters of the transition to the throat, it should work fine. You should be able to see the entire edge of the suction port by looking down the discharge cone.
If you inadvertently drill through to the throat it’s unlikely the venturi will work. In this case the only option is to melt it down and start again.
--Bio-rich-time-poor 12:25, 13 November 2010 (UTC)
